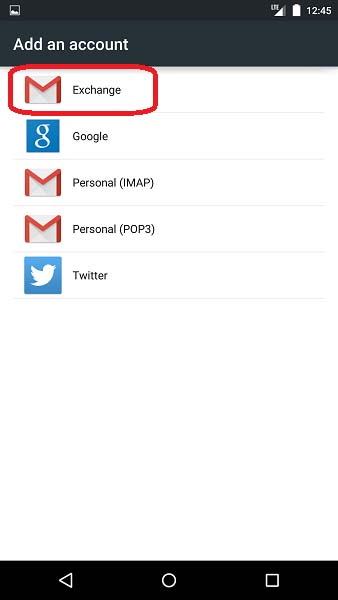
Set up Android 5.0 Devices to webmail Email Exchange Server
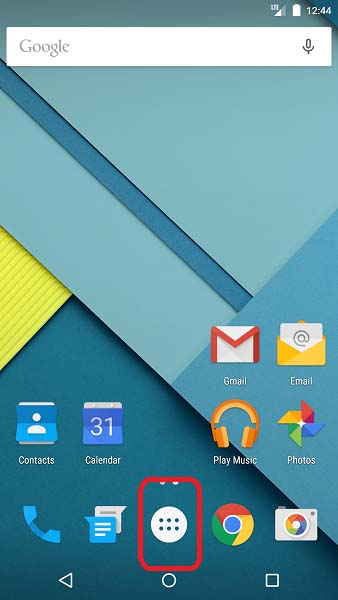
1) Touch the “Apps” icon on your phone screen to open the full list of apps.
Set up Android 5.0 Devices to Email Exchange-1
Set up Android 5.0 Devices to Email Exchange-1
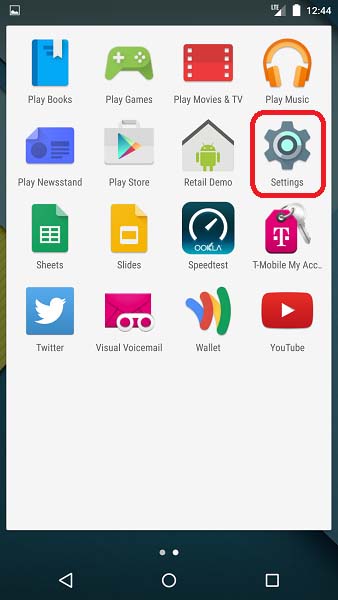
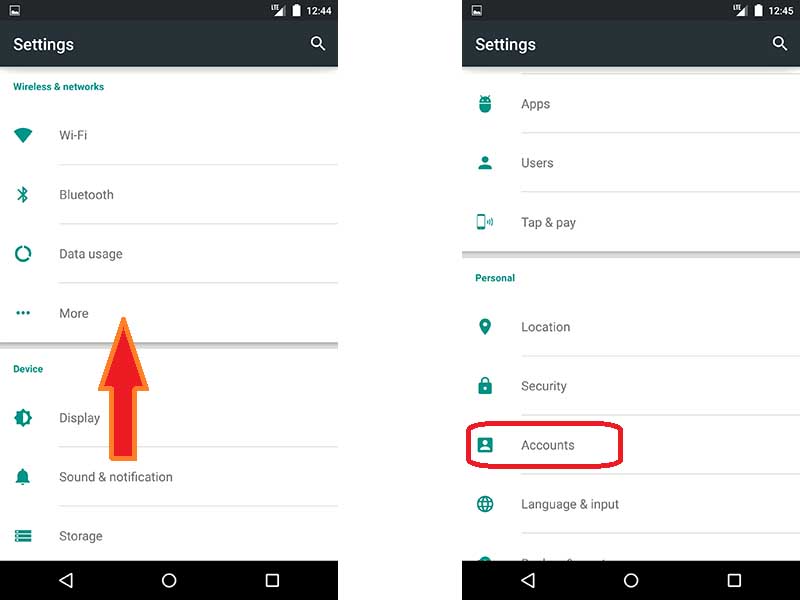
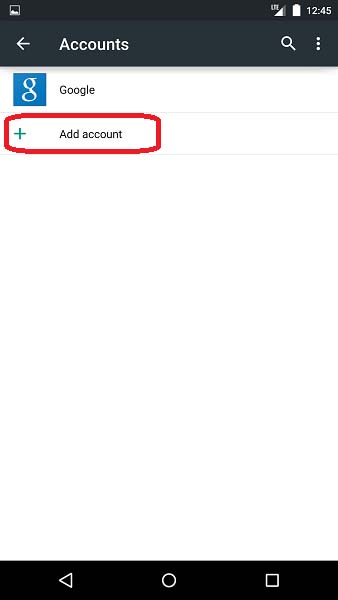
3) Scroll through settings. Tap “Accounts”.
Set up Android 5.0 Devices to Email Exchange-3
Set up Android 5.0 Devices to Email Exchange-3
Set up Android 5.0 Devices to Email Exchange-3
6) Enter your email address given and then tap “Manual Setup”.
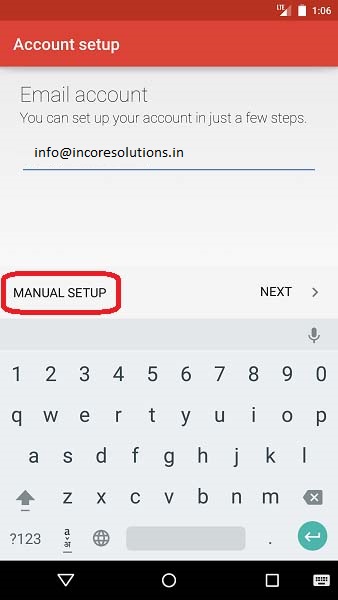
Set up Android 5.0 Devices to Email Exchange-66
7) In the password box, enter your password
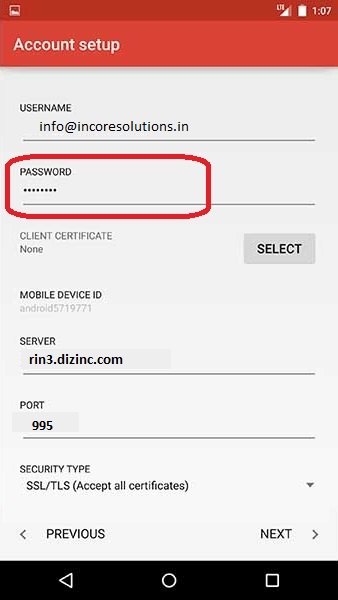
Set up Android 5.0 Devices to Email Exchange-77
8) On the same screens, scroll down and Touch “Security Type”. Select the “SSL/TLS (Accept all certificates)” option from the drop-down list.
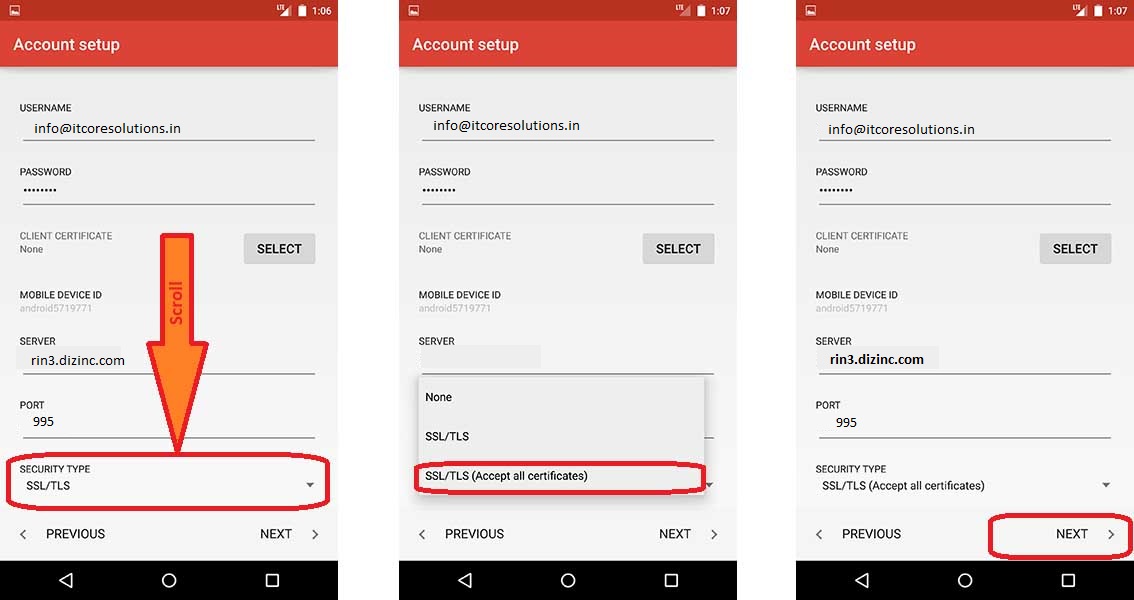
Set up Android 5.0 Devices to Email Exchange-8
Incoming Server: rin3.dizinc.com
POP3 Port: 995
Outgoing Server: rin3.dizinc.com
SMTP Port: 465
9) Touch “Next” to complete the setup.

Set up Android 5.0 Devices to Email Exchange-9
10) Name the new account . Tap “Done”.
Your webmail, Live, Outlook contacts and calendar should start appearing on your Android 5.0 Lollipop Android phone. It may take from a few minutes to an hour until all the data appears, depending on how much data you have. Plug your phone into a power source, keep Wi-Fi on and keep AkrutoSync window open on your PC until all data is transferred.